Front Steering Knuckle: Service and Repair
Wheel Knuckle
Special Tool(s)
Removal
1. Remove the brake disc.
2. Remove and discard the wheel hub nut.
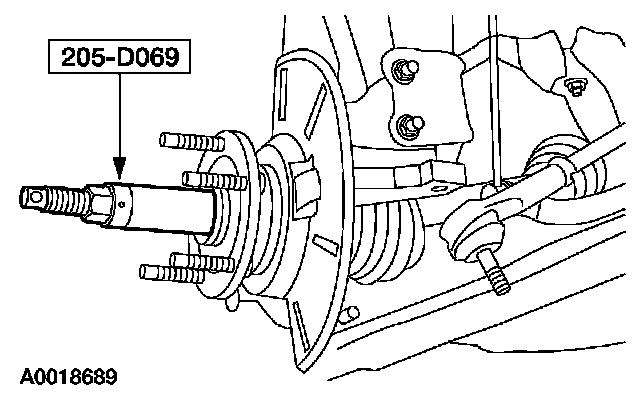
3. Using the special tool, separate the outer CV joint spindle from the wheel hub.
4. Remove the cotter pin and the tie-rod end-to-knuckle nut.
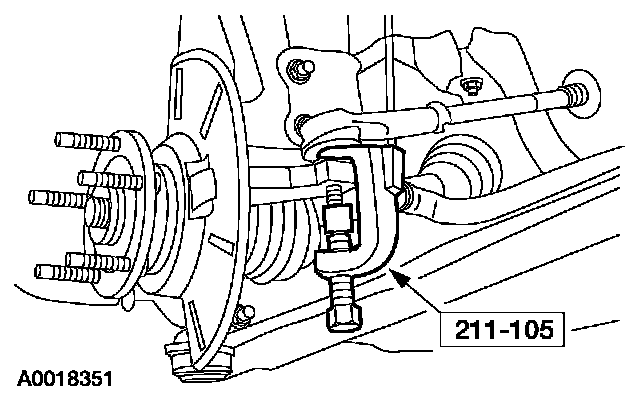
5. CAUTION: Do not use a hammer to separate the tie-rod end from the wheel knuckle or damage to the wheel knuckle can result.
CAUTION: Do not damage the tie-rod end boot while installing the special tool.
Using the special tool, separate the tie-rod from the wheel knuckle.
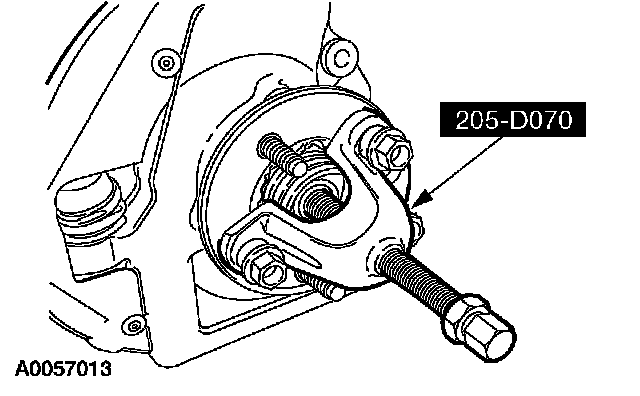
6. Remove the lower ball joint pinch bolt nut and the pinch bolt.
7. Remove the anti-lock brake system (ABS) wheel speed sensor bolt and position the sensor aside.
8. Separate the lower ball joint from the wheel knuckle.
9. Remove the 2 strut-to-knuckle nuts, bolts and the wheel knuckle.
Installation
1. Position the wheel knuckle and install the 2 strut-to-knuckle bolts and nuts.
^ Tighten to 115 Nm (85 ft. lbs.).
2. Position and align the ball joint stud into the wheel knuckle.
3. Install the lower ball joint pinch bolt and nut.
^ Tighten to 70 Nm (52 ft. lbs.).
4. Install the ABS wheel speed sensor and the bolt.
^ Tighten to 9 Nm (80 inch lbs.).
5. Position the tie rod-end into the wheel knuckle and install the tie-rod end-to-knuckle nut and a new cotter pin.
^ Tighten to 55 Nm (41 ft. lbs.).
6. Using the special tool, insert the halfshaft into the wheel hub.
7. Install the wheel hub nut.
^ Tighten to 290 Nm (214 ft. lbs.).
8. Install the brake disc.
9. Check and, if necessary, align the front end.