Alternator: Service and Repair
GENERATOR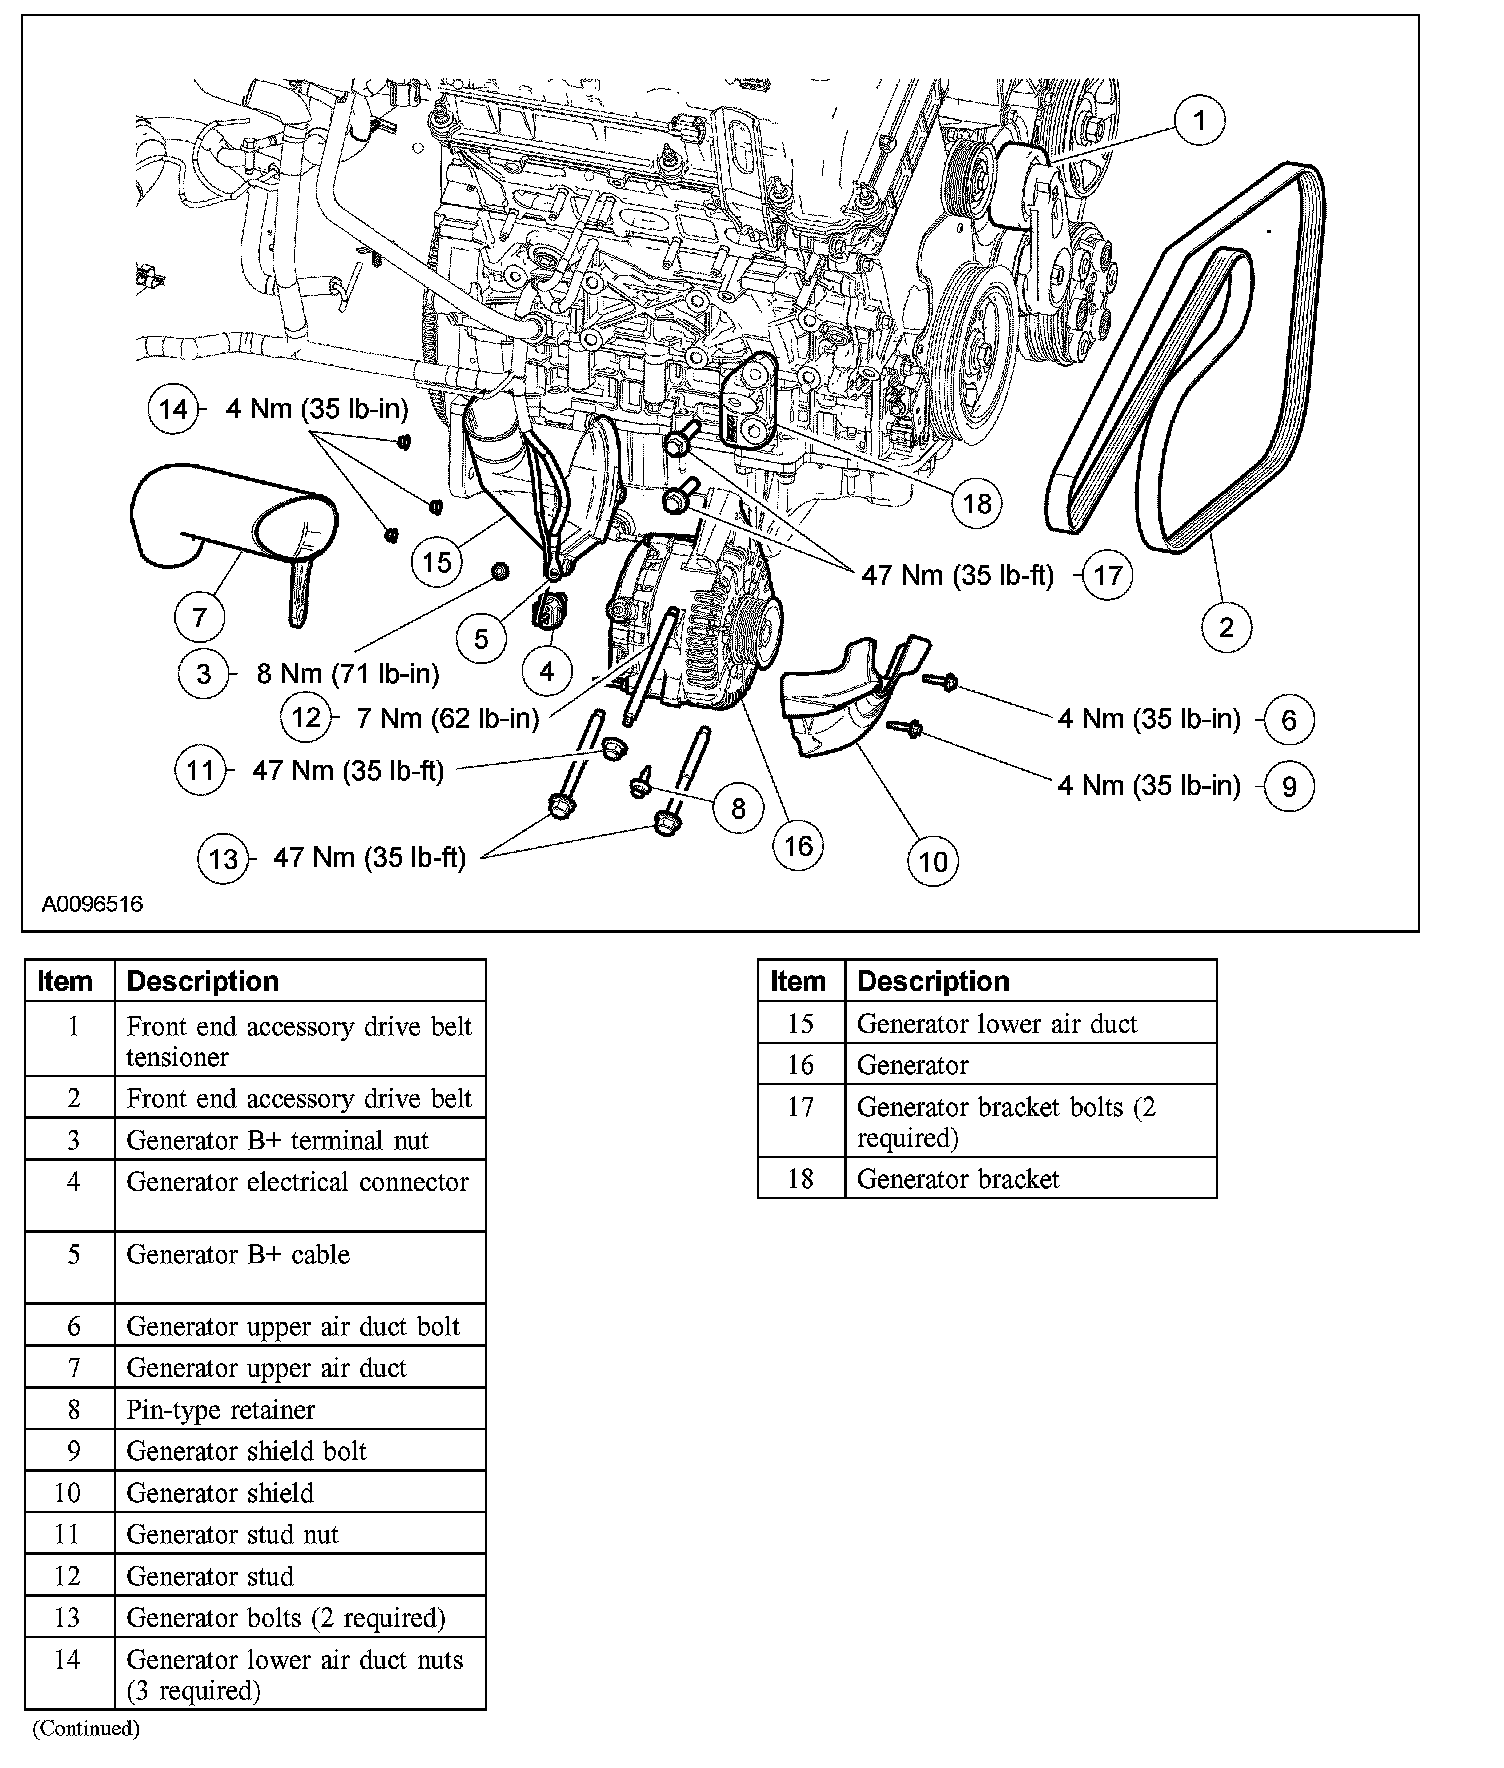
Removal and Installation
1. CAUTION: Do not allow any metal object to come in contact with the generator housing and internal diode cooling fins. A short circuit may result and burn out the diodes.
Disconnect the battery.
2. Remove the RH intermediate axle shaft.
3. Remove the 6 lower splash shield bolts and the 2 pin-type retainers.
- To install, tighten to 8 Nm (71 lb-in).
4. NOTE: The LH lower splash shield must be removed before the RH lower splash shield.
Remove the lower splash shields.
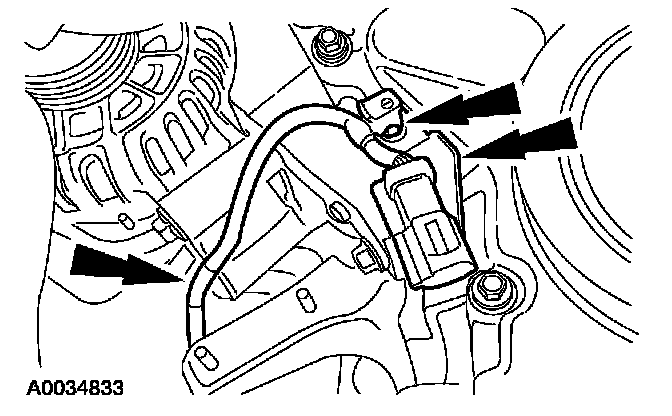
5. Remove the nut and position the bracket and wiring harness aside.
6. Rotate the front end accessory drive tensioner counterclockwise and position the accessory drive belt aside.
7. Position the generator B+ protective cover aside and remove the generator B+ terminal nut.
- To install, tighten to 8 Nm (71 lb-in).
8. Disconnect the generator electrical connector.
9. Remove the generator upper air duct bolt.
- To install, tighten to 4 Nm (35 lb-in).
10. Loosen the 2 lower generator bolts and remove the generator upper air duct.
11. Remove the pin-type retainer from the generator shield.
12. Remove the bolt and the generator shield.
- To install, tighten to 4 Nm (35 lb-in)
13. Remove the generator stud nut.
- To install, tighten to 47 Nm (35 lb-ft).
14. Remove the generator stud.
- To install, tighten to 7 Nm (62 lb-in).
15. Remove the 2 generator bolts.
- To install, tighten to 47 Nm (35 lb-ft).
16. Position the generator aside and remove the 3 generator lower air duct nuts.
- To install, tighten to 4 Nm (35 lb-in).
17. Remove the generator lower air duct.
18. Rotate the generator to gain enough clearance and remove it through the opening in the fender well.
19. If necessary, remove the 2 generator bracket bolts and the generator bracket.
- To install, tighten to 47 Nm (35 lb-ft).
20. To install, reverse the removal procedure.