Housing Assembly HVAC: Service and Repair
EVAPORATOR CORE HOUSING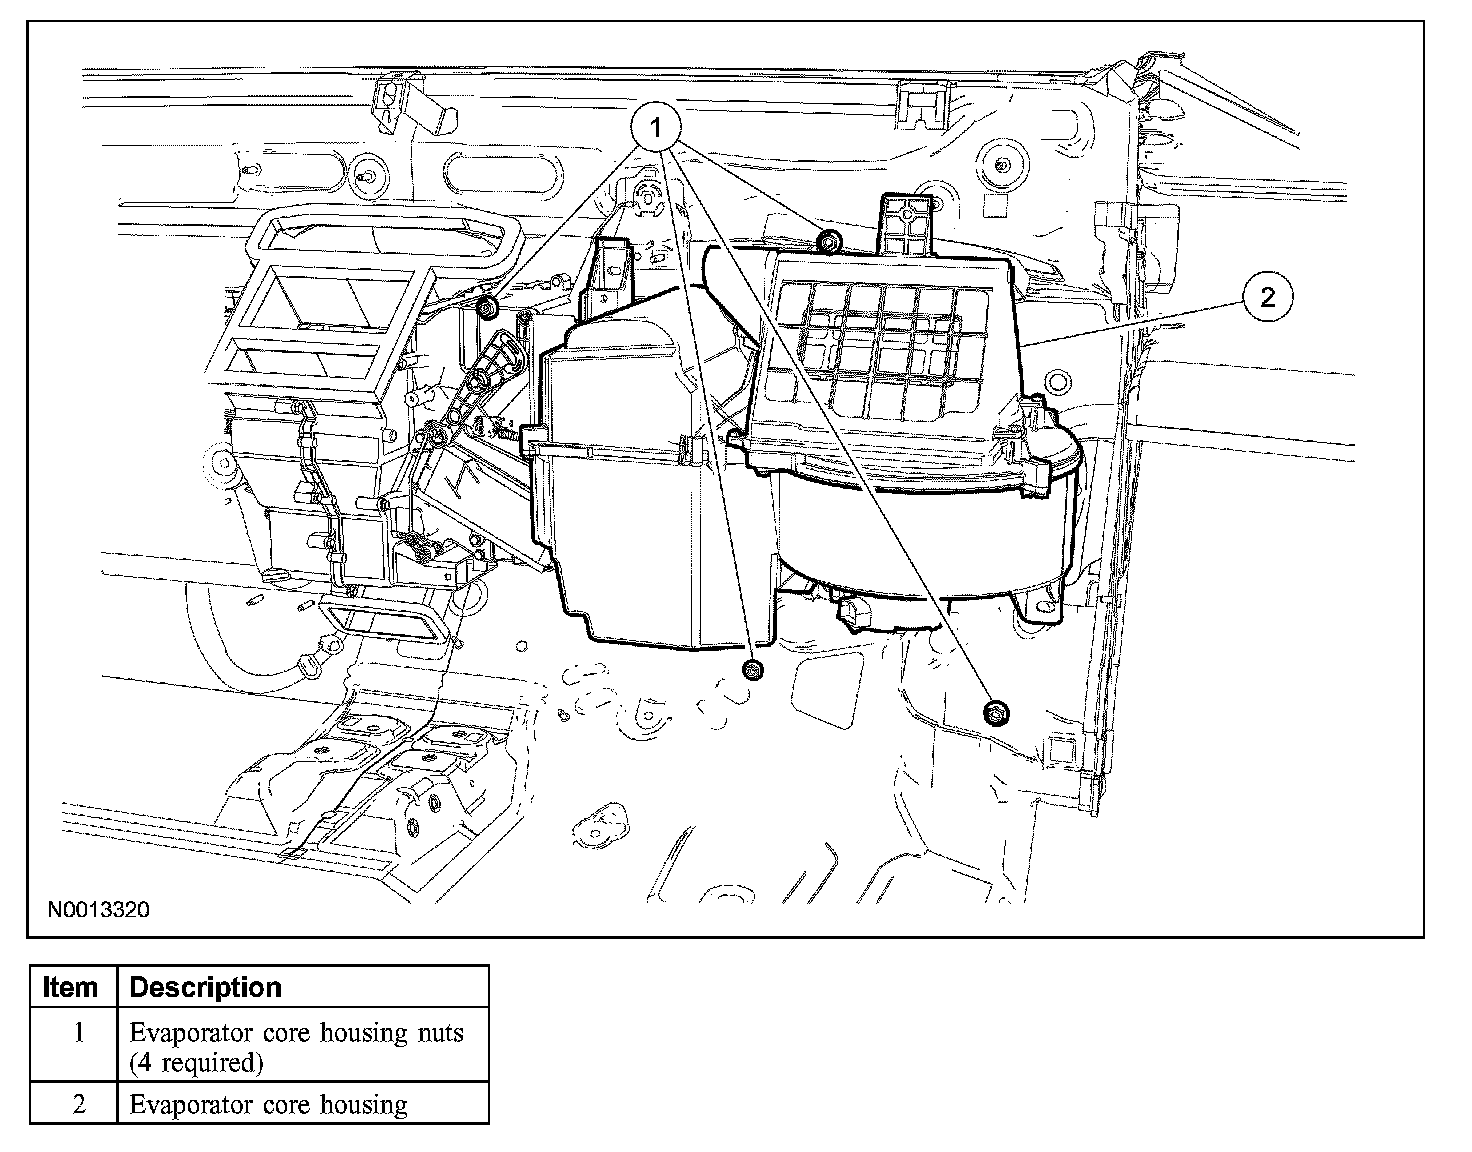
Removal and Installation
NOTE:
- If an evaporator core leak is suspected, the evaporator core must be vacuum leak tested before it is removed from the vehicle.
- Installation of a new accumulator is not required when repairing the air conditioning system except when there is physical evidence of contamination from a failed A/C compressor or damage to the accumulator.
1. Recover the refrigerant.
2. Remove the instrument panel. Refer to: Body and Frame, Interior Moulding/Trim, Dashboard/Instrument Panel, Service and Repair, Removal and Installation, Removal and Installation
3. Disconnect the vacuum hose.
4. Disconnect the 2 evaporator core spring lock couplings.
5. NOTE: Carefully remove the evaporator core housing to avoid spilling PAG compressor oil in the passenger area.
Remove the 4 evaporator core housing nuts and the evaporator core housing.
- Transfer any necessary external components from the old evaporator core housing to the new evaporator core housing.
6. NOTE:
- Feed the vacuum hose through the opening in the cowl while installing the housing.
- Before installing the temperature control cable, make sure the blend door, cable and temperature switch are correctly positioned.
- New O-ring seals lubricated with clean mineral oil must be installed before connecting any A/C fitting which has been disconnected.
To install, reverse the removal procedure.
- Lubricate the refrigerant system with the correct amount of PAG oil.
- Evacuate, leak test, and charge the refrigerant system.