Compressor Clutch Coil: Service and Repair
CLUTCH AND CLUTCH FIELD COILSpecial Tool(s):
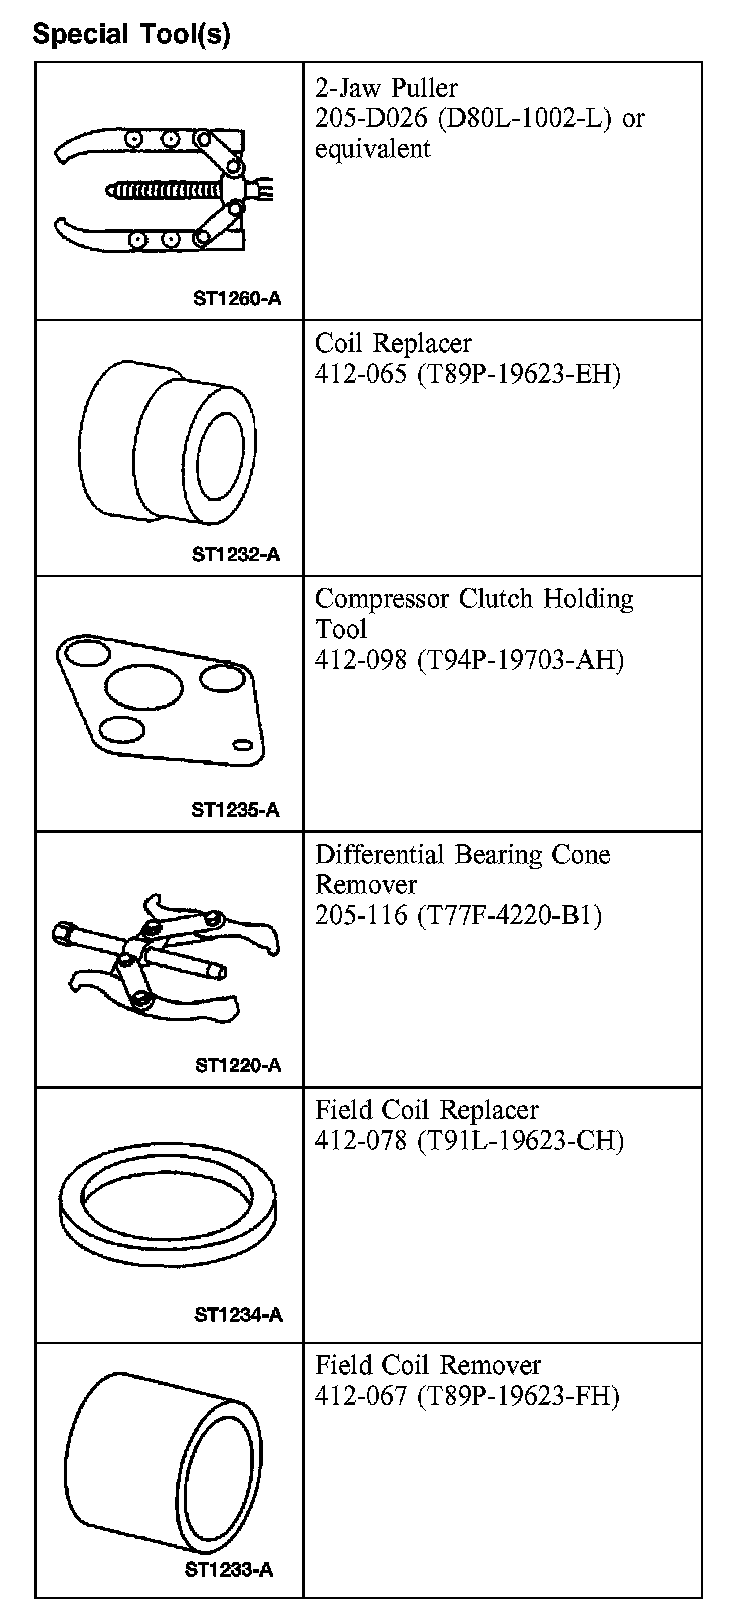
Special Tool(s)
Removal
1. Remove the A/C compressor.
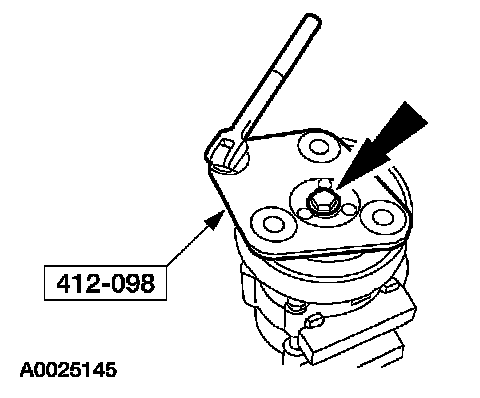
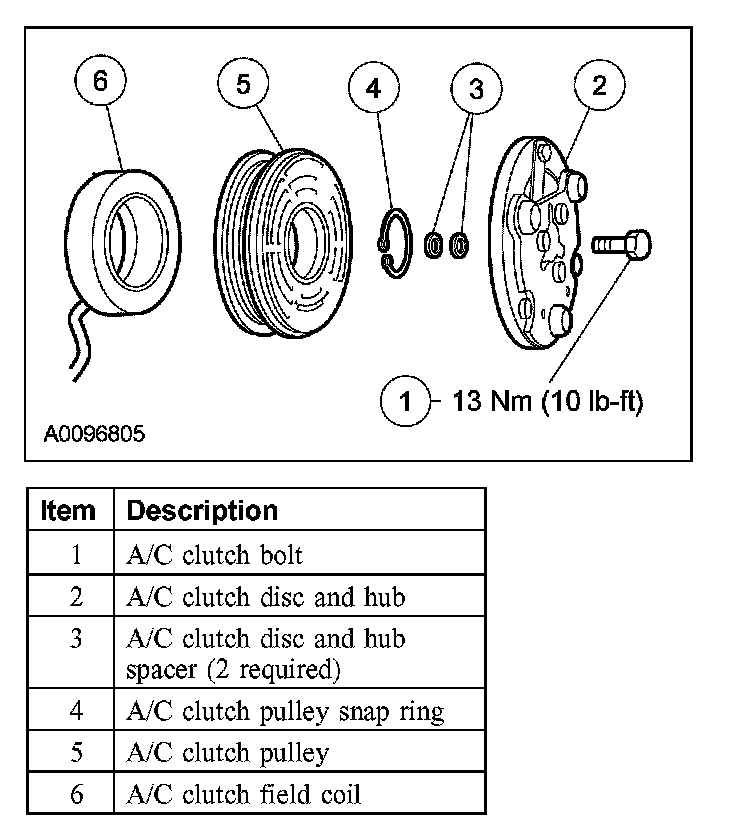
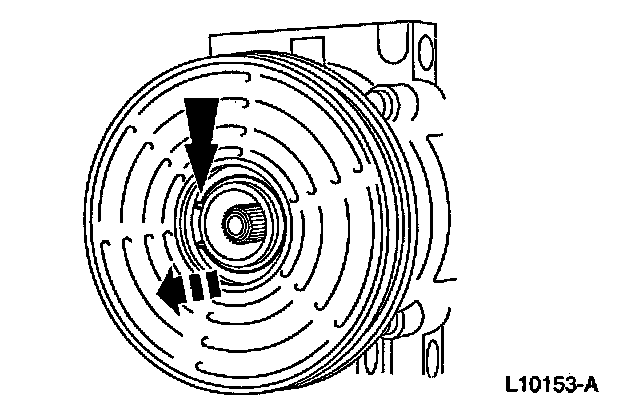
2. Using the special tool, remove the A/C clutch bolt.
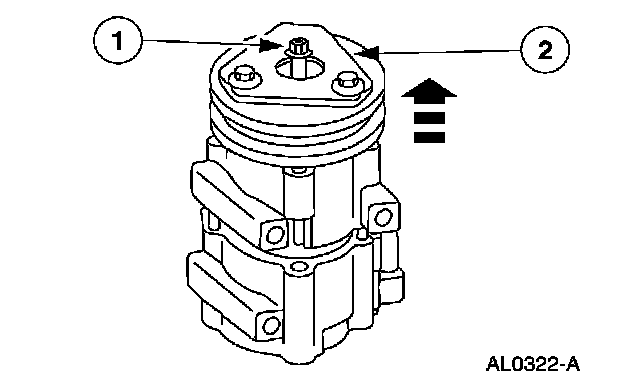
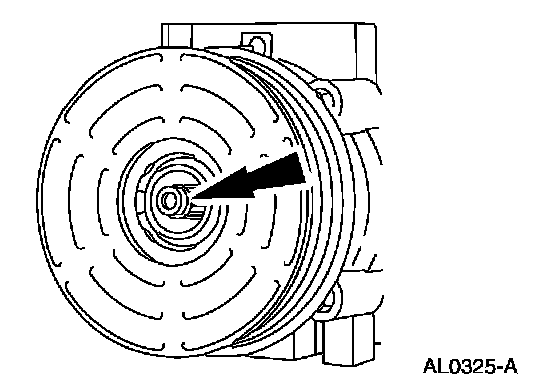
3. Remove the A/C disc and hub assembly and the A/C clutch hub spacers.
1 Thread an 8 x 1.25 mm bolt into the A/C clutch disc and hub to force it from the compressor shaft.
2 Lift the clutch disc and hub assembly and the A/C clutch disc and hub spacers from the compressor shaft.
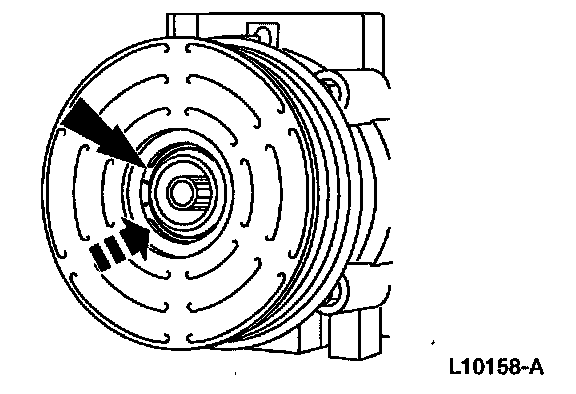
4. Remove the A/C clutch pulley snap ring.
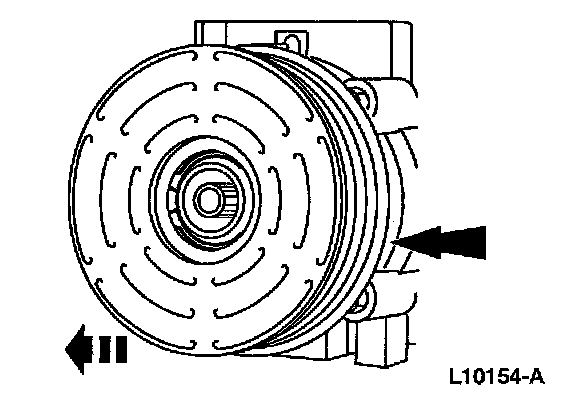
5. Remove the A/C clutch pulley.

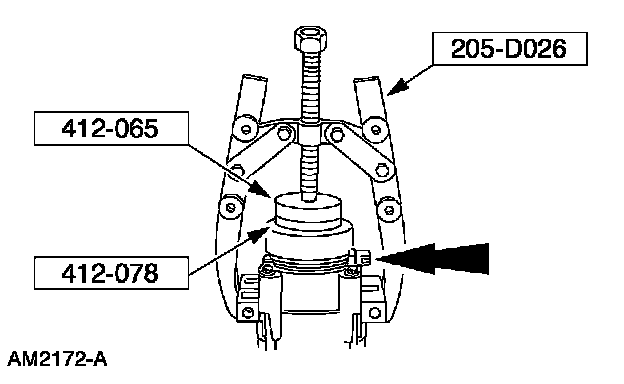
6. CAUTION: Do not use air tools. The A/C clutch field coil can be easily damaged.
Remove the A/C clutch field coil.
1 Note the location of the A/C clutch field coil electrical connector.
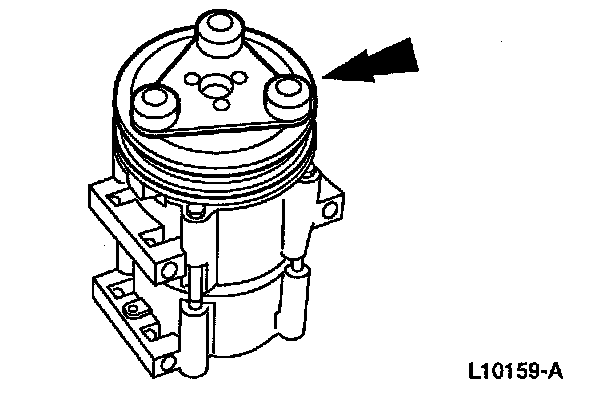
2 Using the special tools, remove the A/C clutch field coil.
Installation
1. Clean the A/C clutch field coil and pulley mounting surfaces.
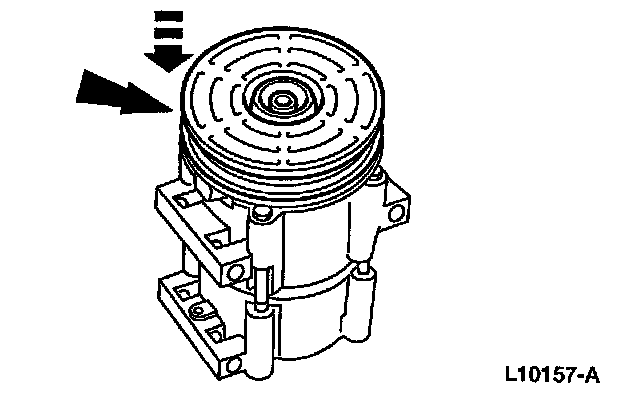
2. CAUTION: Do not use air tools. The A/C clutch field coil can be easily damaged.
NOTE: Position the A/C clutch field coil on the A/C compressor as previously marked.
Using the special tools, install the A/C clutch field coil.
3. NOTE: The A/C clutch pulley is a tight fit on the A/C compressor head. It must be correctly aligned during installation.
Install the A/C clutch pulley.
4. Install the A/C clutch pulley snap ring with the bevel side out.
5. Place 1 nominal thickness A/C clutch hub spacer inside the clutch hub spline opening.
6. Install the A/C clutch disc and hub assembly.
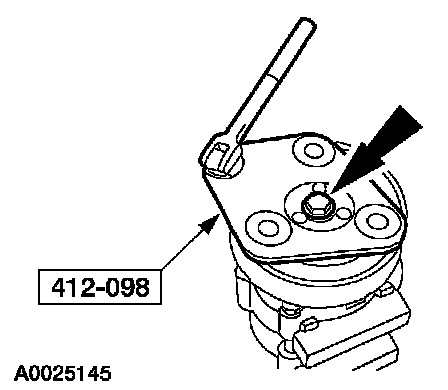
7. Using the special tool, install the A/C clutch bolt.
- Tighten to 13 Nm (10 lb-ft).
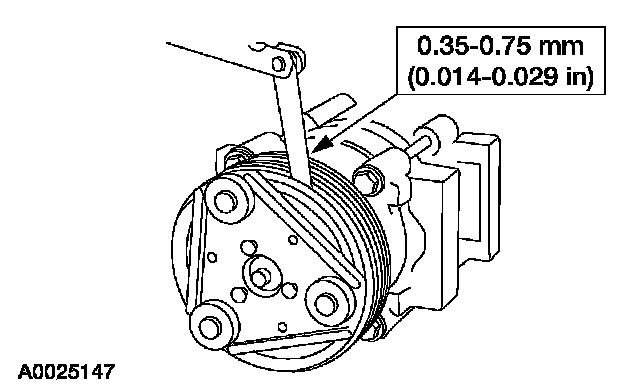
8. Measure and adjust the clutch air gap by removing or adding A/C clutch hub spacers.
9. Install the A/C compressor.