Headliner: Service and Repair
HEADLINERPart 1:
Part 2:
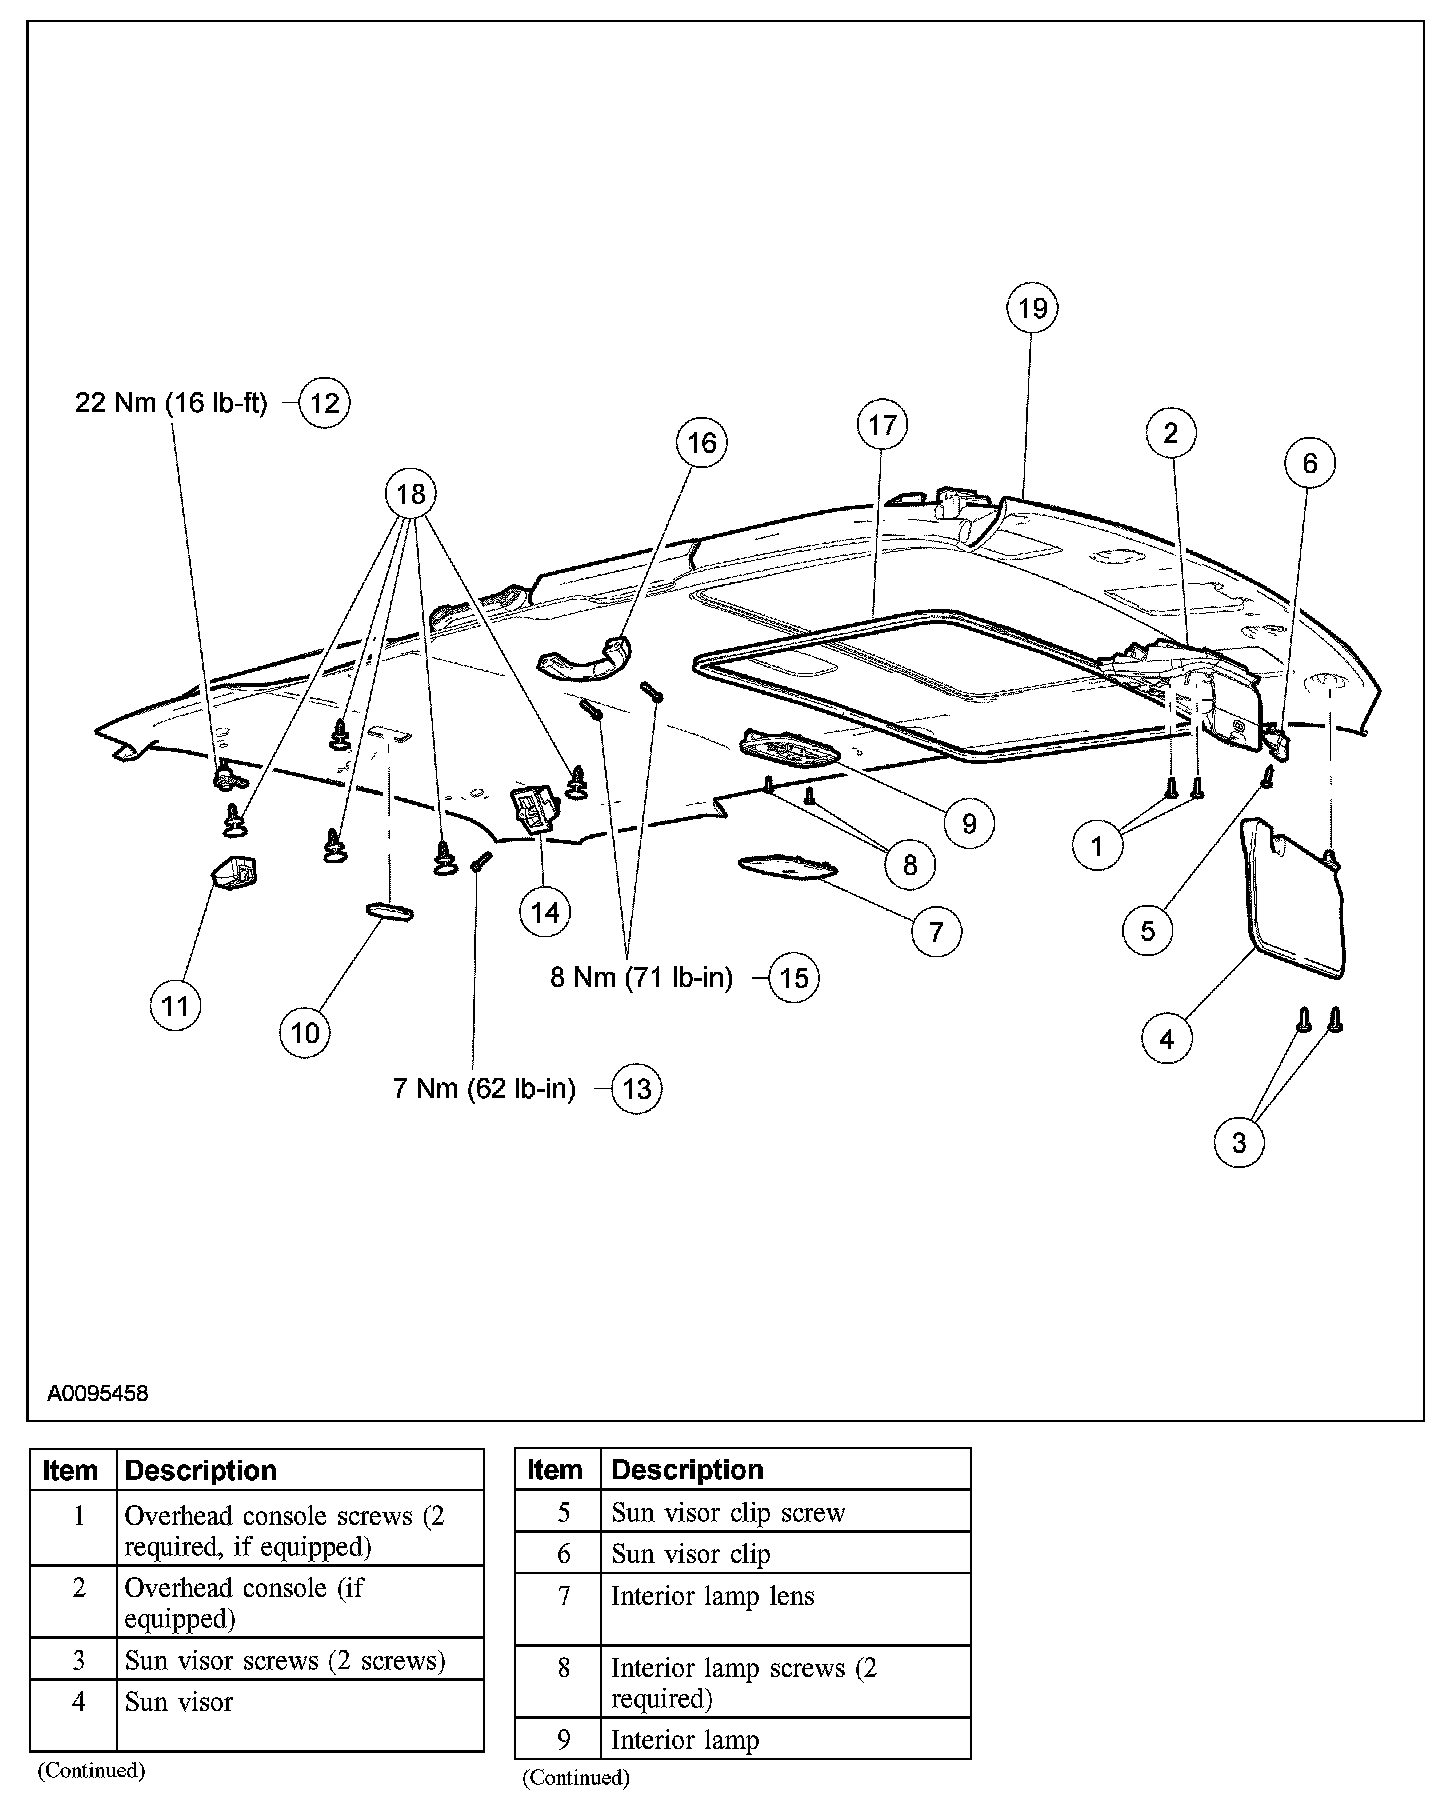
Removal and Installation
1. Disconnect the battery.
2. Open the 4 A-pillar passenger assist handle covers.
3. Remove the 4 bolts and the 2 A-pillar passenger assist handles.
- To install, tighten to 5 Nm (44 lb-in).
4. Remove the 2 A-pillar trim panels.
5. Remove the 2 B-pillar trim panels.
6. Remove the 2 C-pillar trim panels.
7. Remove the 2 D-pillar trim panels.
8. Remove the 2 screws and the overhead console.
- Disconnect the electrical connector.
9. Remove the 4 screws, the 2 sun visors and the 2 clips.
- If equipped, disconnect the electrical connectors.
10. Remove the interior lamp lens.
11. Remove the 2 interior lamp screws and the front interior lamp.
- Disconnect the electrical connector.
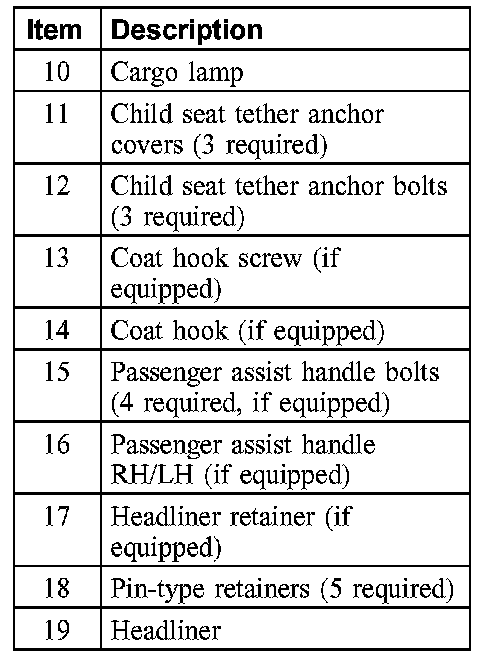
12. Remove the cargo lamp.
- Disconnect the electrical connector.
13. Remove the 3 child seat tether anchor covers.
14. Remove the 3 bolts and the child seat tether anchors.
- To install, tighten to 22 Nm (16 lb-ft).
15. If equipped, remove the 2 screws and the coat hooks.
- To install, tighten to 7 Nm (62 lb-in).
16. Remove the 4 passenger assist handle bolts and the 2 passenger assist handles.
- To install, tighten to 8 Nm (71 lb-in).
17. NOTE: When installing the retainer it should meet at the rear of the roof opening and have no gaps or overlaps.
If equipped, remove the headliner retainer.
18. Remove the 5 headliner pin-type retainers.
19. CAUTION: Do not disconnect the delete resistor during headliner removal.
If equipped, cut and remove the lanyard between the delete resistor and the headliner.
20. Remove the headliner.
21. To install, reverse the removal procedure.